10.0.0.1 Piso WiFi Pause Time App, Voucher Code & Machine Price (2027)

πŸ“± No Download Needed (2027)

10.0.0.1 Piso WiFi Pause Time App & Voucher Portal

You do not need to install any APK from Google Play to pause Piso WiFi time or enter a voucher code. Connect to the Piso WiFi network first, then open your browser portal:

10.0.0.1 Piso WiFi Pause Time App Voucher Code and Machine Price Philippines 2027

Many users across the Philippines search for the piso wifi 10.0.0.1 pause time app, 10.0.0.1 piso wifi voucher code, and updated 2027 Piso WiFi machine prices. Below is the complete, up-to-date guide covering how to save 10.0.0.1 as a 1-tap app icon on Android and iPhone, how voucher codes work safely, and how much plug-and-play LPB/Ado Piso WiFi machines cost.

1. Piso WiFi 10.0.0.1 Pause Time App (Android & iPhone 1-Tap Shortcut)

First, an important warning: there is no official third-party mobile app on Play Store or App Store that can control every Piso WiFi machine. Every LPB, AdoSoft, and JuanFi vendo machine runs its Pause Time and Insert Coin interface directly inside a local web portal at http://10.0.0.1 (or http://10.10.10.1).

However, you can turn http://10.0.0.1 into a 1-tap Home Screen App on your phone in 10 seconds:

  1. Connect to your nearby Piso WiFi hotspot and open Chrome (Android) or Safari (iPhone).
  2. Visit http://10.0.0.1 while Mobile Data is turned off.
  3. On Android Chrome: Tap the 3 dots (⋮) in the top right → tap Add to Home screen → name it Piso WiFi 10.0.0.1.
  4. On iPhone Safari: Tap the Share icon at the bottom → select Add to Home Screen → tap Add.

Whenever you need to pause time, insert coins, or check remaining minutes, simply tap the new icon on your Home Screenβ€”just like a native app!

2. 10.0.0.1 Piso WiFi Voucher Code: How to Buy & Redeem Safely

In 2026–2027, many Piso WiFi machines offer both physical coins and voucher code login (great for sari-sari stores, GCash/Maya payments, and indoor roommates who cannot walk up to the coin slot).

  1. Get a Valid Code: Purchase a printed voucher ticket from the vendo owner, or pay via GCash / Maya QR Ph directly inside the portal to receive an instant voucher code on screen.
  2. Open the Portal: Visit http://10.0.0.1 or http://10.10.10.1.
  3. Enter Your Voucher: Tap the Use Voucher / Enter Code box, type the exact alphanumeric code, and tap Submit / Activate.

Beware of “Free Piso WiFi Voucher Code Generators”: Websites or APKs claiming to generate free 10.0.0.1 vouchers are fake or malware. Valid voucher codes are cryptographically stored inside the local vendo board’s database created by the machine owner.

3. 10.0.0.1 Piso WiFi Pause Time Machine Price Philippines (2027 Guide)

Planning to start or upgrade a Piso WiFi business for 2027? Machine prices in the Philippines vary based on board type (Orange Pi vs Raspberry Pi), outdoor WiFi range (Comfast/TP-Link EAP CPE), and cashless GCash/QR Ph support:

Machine Package TypeEstimated Price (PH)Key Specs & Best Use
DIY Orange Pi / ESP32 Kit (Board + Coin Slot)₱3,500 – ₱5,500Unassembled parts; best for tech builders with spare box & router
Plug & Play Single-Band Indoor Vendo (LPB / Ado)₱6,500 – ₱9,500Ready-to-earn steel box, multi-coin slot, Pause Time, 30–50m coverage
Dual-Band Outdoor Vendo (Comfast EW71/EW73 + LPB/Ado)₱10,500 – ₱14,500High-range 2.4GHz + 5GHz outdoor antenna for sari-sari stores & streets
Pro 2027 Cashless + Sub-Vendo Tower (QR Ph / GCash)₱15,000 – ₱18,500Bill acceptor or GCash/Maya QR Ph e-payment, 80+ simultaneous users

Frequently Asked Questions

Is there an APK download for 10.0.0.1 Piso WiFi Pause Time?

No APK is required. Simply open http://10.0.0.1 in Chrome or Safari and use Add to Home Screen for an instant app shortcut.

What if my Piso WiFi Voucher Code says Invalid?

Double-check uppercase/lowercase characters (O vs 0, l vs 1), make sure you are connected to the exact machine that issued the voucher, and confirm it has not already been redeemed.

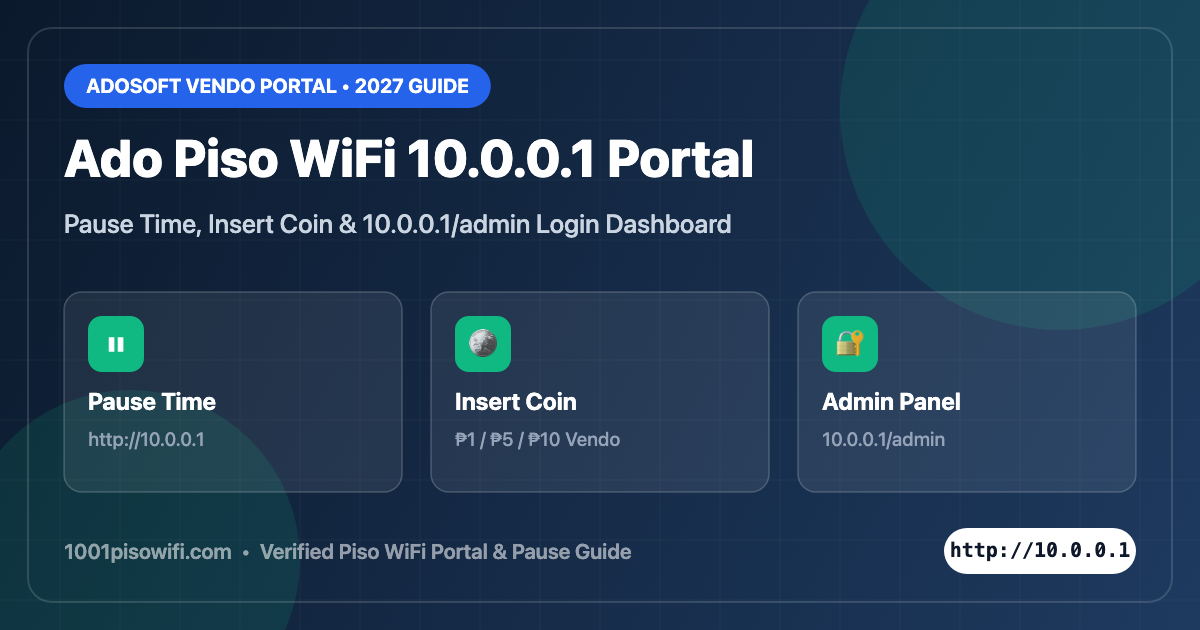
Ado Piso WiFi 10.0.0.1 Portal: Pause Time, Login & Admin (2027)

⚑ Instant Ado Portal Connect (2027)

Ado Piso WiFi 10.0.0.1 Quick Gateway & Admin Panel

Connect your phone or laptop to the Ado Piso WiFi hotspot first, turn Mobile Data OFF, then tap the portal link below:

Ado Piso WiFi 10.0.0.1 Pause Time Login and Admin Portal

If you are connected to an Ado Piso WiFi vending machine (often searched with spacing typos like 10.0 0.1 ado wifi or 10.0 0.1 ado wifi pause), your browser uses the gateway IP http://10.0.0.1 to insert coins, redeem vouchers, and pause or resume your internet time.

How to Use Ado Piso WiFi 10.0.0.1 Pause Time

  1. Make sure your device is still connected to the same Ado Piso WiFi SSID and keep Mobile Data turned off.
  2. Open Chrome or Safari and type http://10.0.0.1 (use http://, not https://).
  3. On the captive portal dashboard, look at your remaining session timer and tap the orange or red Pause Time button.
  4. Your remaining minutes are saved to your device MAC/cookie session. When you return near the machine, open http://10.0.0.1 again and tap Resume Time.

Tip for Android & iPhone users: If the Pause button says “Time paused” and then disappears after switching WiFi networks, enable Use Device MAC instead of “Randomized MAC” for that Piso WiFi SSID in your phone’s WiFi settings so the Ado machine recognizes your returning phone automatically.

How to Insert Coin on Ado Piso WiFi (10.0.0.1)

  1. Connect to the Ado WiFi signal and launch http://10.0.0.1.
  2. Tap the green Insert Coin button on screen and wait for the coin slot LED light on the vendo box to blink or beep.
  3. Drop β‚±1, β‚±5, or β‚±10 coins one by one (avoid bent coins). Watch the minutes counter on your phone screen increase in real time.
  4. Tap Done Paying / Connect before the countdown timer expires so your credits activate immediately.

Ado Piso WiFi Admin Login (10.0.0.1/admin)

Vendo owners can manage coin rates, bandwidth speed limits, voucher generation, and firmware updates through the AdoSoft Admin Panel:

  • Primary Admin URL: http://10.0.0.1/admin (or http://10.10.10.1/admin on dual-WAN setups)
  • Default Login Details: Typically printed on the inside board/sticker of your AdoSoft Orange Pi / Raspberry Pi kit, or configured during initial flashing (e.g., admin / custom operator PIN). Always change default admin credentials immediately after setup to lock unauthorized users out of your vendo dashboard.
  • 2026–2027 Ado Update Features: Supports Multi-Coin Slot + GCash/Maya QR Ph e-loading, Randomized MAC handling via token vouchers, and per-user speed throttling.

AdoSoft vs LPB vs JuanFi Portal IPs Comparison

Piso WiFi SystemCustomer Portal URLAdmin Dashboard URLPause Time Support
AdoSoft / Ado Piso WiFihttp://10.0.0.1 / 10.10.10.1http://10.0.0.1/adminYes (Built-in Pause & Voucher Resume)
LPB Piso WiFihttp://10.0.0.1 / http://lpb.wifihttp://10.0.0.1/adminYes (Pause Time Button)
JuanFi / MikroTikhttp://10.10.10.1 / 10.0.0.1Winbox / WebFig GatewayVoucher-based Pause & Resume

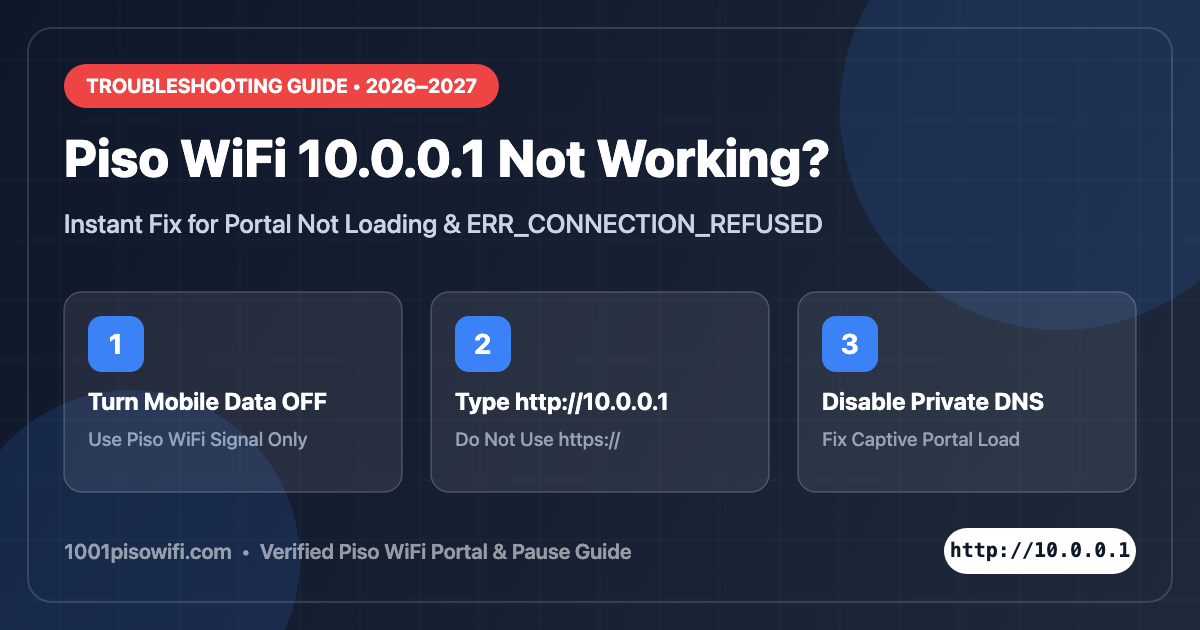
Why Won’t 10.0.0.1 Ado WiFi Load? (5 Quick Fixes)

  • Check Spacing Typos: Make sure you did not type 10.0 0.1 ado wifi or 10.0.0..1 with a space or extra dot.
  • Turn Off Mobile Data: Android & iOS often route 10.0.0.1 through LTE/5G when WiFi says “No Internet”. Turn Mobile Data off temporarily.
  • Use HTTP Instead of HTTPS: Browsers auto-upgrade to https://10.0.0.1 and fail with ERR_CONNECTION_REFUSED. Explicitly type http://10.0.0.1.
  • Disable Private DNS / VPN: Turn off Google/Cloudflare Private DNS or any VPN app while opening the portal.
  • Clear Browser Cache or Try Incognito: Open a fresh Incognito tab and visit http://10.0.0.1 or http://10.10.10.1.

Frequently Asked Questions (Ado Piso WiFi 10.0.0.1)

How do I check my remaining time on Ado Piso WiFi?

Open http://10.0.0.1 while connected to the Ado WiFi SSID. Your active countdown timer and current connection speed are shown right at the top of the portal.

Can I pause time on 10.0.0.1 Ado WiFi and resume tomorrow?

Yes, as long as the machine owner has enabled the Pause Time validity window (for example, 24 hours or 7 days). Always switch your WiFi privacy setting to “Use Device MAC” before disconnecting so your paused balance isn’t lost.

Piso WiFi 10.0.0.1 Not Working? How to Fix & Open Login Portal (2026–2027)

Troubleshooting Guide

Piso WiFi 10.0.0.1 Not Working? Fix White Screen & Login Issues

Step-by-step solutions when 10.0.0.1, 10.0.0.0.1, or lpb.wifi won’t load.

Piso WiFi 10.0.0.1 Not Working Fix Login Portal Guide

One of the most frustrating experiences with public vending internet in the Philippines is when your phone connects to the WiFi network, but navigating to http://10.0.0.1 shows a blank white screen, infinite loading, or the dreaded “Site can’t be reached” (ERR_CONNECTION_REFUSED / ERR_NAME_NOT_RESOLVED) error. In this guide, you will learn why this happens and how to fix it in under 60 seconds.

Why Is 10.0.0.1 Piso WiFi Not Opening?

The 10.0.0.1 address is not an internet websiteβ€”it is the local private IP gateway of the router or Raspberry Pi controller powering the Piso WiFi vendo machine (such as LPB, Ado, or MikroTik). When your browser fails to load it, one of the following 4 reasons is usually the cause:

  • Mobile Data Interference: Your smartphone has active 4G/5G mobile data. Your phone tries to load 10.0.0.1 through your telecom provider (Globe/Smart) instead of the WiFi network.
  • Private DNS is Enabled: Modern Android and iOS devices use Private DNS (like Cloudflare 1.1.1.1 or Google DNS 8.8.8.8), which blocks local captive portals from redirecting.
  • Typo in the Address: Entering 10.0 0.1 (with a space), 10.0.0..1 (double dot), or 10.10.10.l (letter L instead of number 1).
  • Machine Slot / IP Pool Full: The vendo machine has run out of DHCP IP leases or the owner has temporarily disabled portal access.

Top 4 Ways to Fix 10.0.0.1 Piso WiFi Not Loading

Fix 1: Turn Off Mobile Data (Cellular)

Swipe down your notification bar on Android or Control Center on iPhone. Turn OFF Mobile Data completely. Disconnect and reconnect to the Piso WiFi SSID. Now open Chrome and type http://10.0.0.1 directly in the address bar (not the Google search box).

Fix 2: Disable Private DNS

Private DNS is the #1 reason Piso WiFi portals fail on Android 10, 11, 12, 13, and 14:

  1. Open your phone’s Settings > Network & Internet (or Connections).
  2. Tap Private DNS.
  3. Change it from “Automatic” or “Custom” to “Off”.
  4. Reconnect to your Piso WiFi network. The login captive portal will pop up automatically!

Fix 3: Use an Incognito Tab or Clear Browser Cache

Old cached sessions from previous Piso WiFi connections can block the new machine’s portal. Open your browser in Incognito Mode or Private Browsing, and visit http://10.0.0.1 or http://10.0.0.1/status.

Fix 4: Check Alternate Gateway IPs

Not all vendo machines use 10.0.0.1. Depending on whether the owner uses LPB, Ado, or custom OpenWrt firmware, try these alternative portal links:

Vendo TypePortal LinkAlternative Address
LPB Piso WiFihttp://10.0.0.1http://lpb.wifi/index.php
Ado Piso WiFihttp://10.0.0.1http://10.10.10.1
MikroTik Hotspothttp://10.0.0.1http://192.168.88.1
Custom Routerhttp://10.10.0.1http://20.0.0.1

How to Pause Time Once Connected

Once you regain access to the portal, you can pause your session so your remaining coins do not get consumed while you are away:

  1. Navigate to the active portal dashboard at http://10.0.0.1.
  2. Verify your remaining minutes and seconds on the screen.
  3. Tap the yellow or red “Pause Time” / “Stop” button.
  4. Take a screenshot of your Voucher / Session Code. When you return, enter this code into the portal to resume your connection seamlessly.

20.0.0.1 Piso WiFi Portal: Login, Pause Time & Admin Access (2027 Guide)

⚑ Quick Fix (2027)

Typed 20.0.0.1 or 20.0 0.1 Piso WiFi?

20.0.0.1 (or 20.0 0.1) is usually a mistyped address or custom router subnet β€” most LPB and Ado Piso WiFi machines open on http://10.0.0.1 or http://10.10.10.1. Tap the verified portal buttons below while connected to the Piso WiFi network:

In today’s era, the Philippines has observe a rush in the popularity of 20.0.0.1 Piso WiFi systems, which offers the affordability of internet access to persons across several communities.

Among so many repetitions of technology, the 20.0 0.1 Piso WiFi system has obtain the remarkable attention because of its simplicity as well as effectiveness.

In this article we have explore everything you need to know about the 20.0 0.1 Piso WiFi so, let’s dig dive into the things which makes the system unique, how the system works, benefits of the system, and considerations users as well as providers.

20.0 0.1 Piso Wifi

What is 20.0 0.1 Piso WiFi?

20.0 0.1 Is the IP address usually connected to Piso WiFi systems? It delivers the gateway for users to connect the devices with internet. When any user associate with the network hosted by Piso WiFi, and they rottenly redirected to the login where they need to input the code or token buy for inserting coins.

How does it work?

The working of 20.0 0.1 Piso WiFi is measured with the help of following component:

Hardware: The hardware component includes the router frame with IP address 20.0.0.1, coin or may call it as token acceptor, as well as any advance networking equipment needed with the setup.

Software: There are some specialised software installed on router or on the separate servers which manages user authentication and internet access control, as well as accounting of usage.

Coin Mechanism: User need to insert coins or tokens into machine to buy the internet access. Once customer’s payment is verified, then system allows access to the predetermined time.

User Interface: When anyone connect to WiFi network, they redirects to the login page where they insert the code or token they received after payment done.

Unique Features:

Affordability: Piso WiFi systems offers the affordable internet access, particularly in areas where traditional internet connections can be expensive as well as unavailable.

Flexibility: Users can purchase the internet access depending on their needs and budget, as they provide the flexible packages user can pay only for time they use the internet.

Revenue generation: Piso WiFi systems might be source for additional revenue for business owners, because they generate income by selling the internet access.

Control and Management: The Piso WiFi systems allows easy management for user accounts, usage monitoring, and setting  limitation on usage.

Benefits for Users:

Connectivity with cost effectiveness: Users can access the internet with affordable price, which makes it the best internet option for students, commuters, as well as any individual within budget.

Convenience: Piso WiFi systems available in different locations like markets, transportation hubs, as well as public places, users can seamlessly access internet service where they go.

Reliability: The expansion of Piso WiFi systems donate to great internet connectivity, particularly in such areas where traditional internet infrastructure can be unreliable.

Setting Up 20.0 0.1 Piso WiFi:

Setting up the Piso WiFi system with IP address 20.0 0.1 includes the following steps:

Installation of hardware: Installation of the router or access point of internet and connect it to internet. Setting up the IP address to 20.0 0.1 as well as configure the essential network settings.

Software configuration: Installation and configuration of the Piso WiFi software. Which involves the setting the user authentication, policies to internet access, and payment options as well.

Token mechanism integration: Installing the coins or tokens mechanism and integrate it with Piso WiFi system. Check the payment process to make sure that it functions properly.

User interface and customization: Customize user login portal with branding as well as instructions for users.  Check user interface to make sure that it is user-friendly software and intuitive as well.

Challenges and Considerations:

Security: Security concerns like unauthorized access to software and misuse of network required to address by robust authentication and advance security mechanisms as well as monitoring tools.

Maintenance: Regular maintenance of hardware as well as software elements is necessary to make sure for smooth operation of Piso WiFi systems and prevent malfunction.

Regulatory Compliance: Piso WiFi systems must comply with operators and relevant regulations as well as licensing requirements that can be different depending on the location.

Conclusion:

In above article we have explore about the 20.0 0.1 captive portal system which represents the easy as well as impactful solution to extend across the digital split up and offers the affordable internet access for communities.

Its user-friendliness, cost-effectiveness packages, and availability everywhere which makes it a great choice among users as well as providers. As ensuring the reliability and sustainability of these systems needed the careful maintenance, measurement of security system, and adherence to internet standards.

As technology continues to make progress, Piso WiFi systems are assured to play an effectively essential role in increasing connectivity as well as fostering digital addition across the Philippines and further on.

1.1.1.0 Piso WiFi Portal: Login, Pause Time & Gateway Guide (2027)

1.1.1.0 Piso WiFi: In today’s digital era, internet access has become basic need of everyone, enabling each and every one to connect, communicate, as well as access information worldwide.

However, many parts in the globe, particularly in developing regions, authentic and affordable internet connections remains a challenge.

In this article we have explore about the innovative solutions like 1.1.1.0 Piso WiFi have come out, transform how people access internet service in public spaces.

1.1.1.0 Piso WiFi

What is 1.1.1.0 Piso WiFi?

1.1.1.0 Piso WiFi comes from Filipino word “Piso,” the meaning of this word is “coin” is a system which offers the internet access to its users for the nominal fee, usually identical to 1 unit of currency, usually mention to as “Piso.”

It operates by the central router or access point, allowing users to connect to internet through WiFi network by securing the access for the specified time.

Significance in providing internet access

The significance of 1.1.1.0 Piso WiFi lie down in its ability to normalise internet, especially in areas where conventional broadband services are short or awfully expensive. By abusing existing framework and execute innovative payment methods, Piso WiFi systems allows the users from all runs of life to enjoy cheap and suitable internet connection in different public settings.

Technical Setup

Components involved in setting up 1.1.1.0 Piso WiFi

  1. Central Router or Internet access point: Which acts as the centre of internet connection and managing user access.
  2. Internet source: Offers the broadband connection needed for internet access.
  3. Portal software: Allows the user authentication and payment methods.
  4. Authentication procedure: Verify the user’s login credentials and allow access to network.
  5. Usage monitoring tools:  It tracks the data consumption and manage network resources perfectly.

Configuration of the central router or Internet access point:

The central router or internet access point is arrange with the essential software and settings to help the convict portal and authentication process. Which involves setting the network parameters, arrange security protocols, and combining payment method functionalities.

Implementation of captive portal and payment procedure:

The captive portal caters as a gateway for individual to access Piso WiFi network. It bring out users to authenticate or to buy access before allowing them the internet connectivity.

Payment process may have included coins, prepaid cards, and electronic payments, with individuals receiving authentication details on successful payment.

Payment Mechanism

Methods of payment accepted:

Piso WiFi systems receives the various payment procedures, including coins, prepaid cards, as well as electronic payments by mobile apps or online platforms. This difference grant the users to choose the appropriate option depends on their preferences as well as accessibility.

Process for users to authenticate and purchase access:

After connecting to Piso WiFi network, individuals are directed to the captive portal, where they can select their preferred payment method as well as buying access for a specified time. Once payment is done, users receive login details or session to access internet.

Issuance of login credentials or session tokens:

After making successful payment, users are received login details or session tokens, which allows them to access internet for the time specified during the buying process. These details are necessary for authenticating users as well as to make sure secure access to the network.

Usage Monitoring

Tracking data consumption and session logs:

Piso WiFi systems hire tools and features as well to track data usage and log user sessions, offering operators with insights of data consumption patterns as well as internet network activity. This information allows proper management of network resources as well as ensures fair consumptions among users.

Bandwidth usage monitoring and management:

Operators monitor bandwidth consumptions to allocate resources successfully and stop network blockages. Bandwidth management techniques like traffic shaping as well as quality of service (QoS), may be executed to prefers the critical traffic and enhance overall network performance.

Enforcement of fair usage policies:

To maintain unbiased access of the network resources, Piso WiFi systems implement the fair usage policies, which includes the bandwidth control or access limitations for user’s immense pre planned usage limits. These policies helps to prevent abuse as well as to make sure a consistent user experience for every individuals.

Benefits of 1.1.1.0 Piso WiFi:

  1. Affordable access to the Internet:

Piso WiFi systems offers the affordable methods of accessing internet, particularly in poor communities where convectional broadband services may be unreachable or expensive.

  1. Revenue generation opportunities for business owners:

Installing a Piso WiFi system can cause further revenue broke for business owners by construct the internet access in their establishments? This can balance the functioning costs and enhance the profitability.

  1. Flexibility in pricing models:

Piso WiFi systems offers the elasticity in cost models, granting operators to modify access fees based on factors like time duration, data consumptions, and prime service level. This elasticity shelters the different user’s preferences and enhance the revenue potential.

  1. Contribution to community connectivity and bridging the digital divide:

By offering affordable internet access, Piso WiFi systems grants the community connectivity and help flyover the digital splits, authorising users accessing information, education, as well as online services. This encourage social insertion as well as economic development.

Implications and Considerations:

Regulatory compliance with data privacy laws and telecommunications regulations:

Operators of Piso WiFi systems make sure that the assent with relevant data privacy laws as well as telecommunications rules to protect user privacy to maintain integrity of the network.

Security measures for protecting user data as well as prevent fraud access:

Executing robust security measures is necessary to protect user data to prevent fraud access or spiteful activities on Piso WiFi network. Which includes the encryption protocols, firewall configurations, as well as regular security updates.

Importance of providing a seamless user experience:

Making sure about the seamless and flexible user experience is essential for user pleasure and control. Operators must invest in robust network framework, ample bandwidth scope, and reactive customer support to label any technical issues efficiently.

Sustainability considerations in deployment and operation:

Operators needs to consider viable as well as environmental impact when arranging and operating Piso WiFi. Which includes the reduced energy consumption, resource utilization, and adopting eco-friendly methods to minimise the system’s carbon footprint on enviourmnet.

Conclusion:

In conclusion, 1.1.1.0 Piso WiFi systems explores the creative innovation in internet access, providing the affordable, accessible, as well as convenient internet connection services for users as well as communities worldwide.

By using innovative technology and reliable pricing models, Piso WiFi systems play an important role in branding digital inclusion, allows the users, and bypassing the digital divide.

In this article we have mention everything you need to know about 1.1.1.0 Piso WiFi, with careful planning as well as strategic executions, Piso WiFi systems has the incredible potential to manage the positive social impact and encourage greater connectivity as well in this digital era.

Pisonet & Piso WiFi 10.0.0.1 Portal Login, Rates & Setup Guide (2027)

Pisonet WiFi: A Pisonet is a major centre point for internet enthusiasts and children’s as well, especially for those who have a very small amount of money to surf on internet as well as play some games that more contributes order to the business.

Pisonet wifi is a mini internet cafe or computer lab usually establishes in the areas in Metro and the Philippines.

In this article we have explore about the Pisonet wifi spectacular’s, where you must know here about the Pisonet logins, portal, its machine price, vendo as well as setup of the Pisonet wifi. Read full article to setup Pisonet wifi properly.

Pisonet WiFi

What is Pisonet WiFi?

Pisonet wifi offers the free internet access to customers and businesses and organizations which installs a WiFi hotspot on their site. Pisonet WiFi is a business which uses coin machines computers situated on places where many people have access but still they are not able to afford an Internet connection.

Pisonet WiFi is business model which developed in Philippines which is becoming popular now in other countries as well. Which offers peoples to share their internet connection with other users around them using wifi hotspots.

Pisonet WiFi works through connecting a router to prepaid electricity meters that offers to connect it to be powered for free at all times. The router allow to access its data connection for nearby users for some hourly fee of PHP 10.

Pisonet WiFi Log In:

Setting up Pisonet wifi login includes the following steps.

  1. Prepare Pisonet setup:

Make sure that your Pisonet setup is proper and complete with computers, internet connection and essential hardware like routers for wifi connectivity.

  1. Select wifi router or access points:

Choose wifi router which meets your needs like speed, coverage, security measures and user authentication.

  1. Configure wifi router:

Login to the administration interface of wifi router and configure wifi network setting with SSID, password, encryption and other important details.

  1. Set up captive portals or WPA2:

Depending on your preference choose one form both of the following methods:

Captive portal: Captive portal needed users to authenticate before accessing internet. Users are usually divert to a login page after connecting to WiFi network.

WPA2-enterprise: WPA2 process uses high level authentication methods like RADIUS servers for authentication. Every user requires a unique username and password to get connected to wifi network.

  • Configure the Captive portal or WPA2 that is RADIUS server.
  • Depends on the authentication process you have chosen, create user account for clients.
  • Regularly maintain or monitor wifi network for any issue or unauthorised access.

Pisonet WiFi Portal:

Creating a Pisonet WiFi Portal with the particular features, you need to follow some steps:

Plan your portal features – consider the options which helps you to please your targeted audience, define social media networks, gaming platforms, entertainment platforms to will integrated to the portal.

Select a platform – Select the platform for developing your WiFi portal. You can chose platforms such as Angular, React, as well as Vue.js. Ans also have option s available like WordPress or Joomla.

Design the user interface – Design user friendly and visually attractive user interface for your portal.

Develop the Portal –   Develop the portal according to your preferences and implement features like user authentication, easy navigation, and integration with other tools.

Test and quality assurance – Test the portal to recognise and fix the bugs or issues to make sure that the all features work smoothly and offers the great user experience among different devices and different web browsers.

Launch and promote the portal – Once the portal is developed fully and tested for bug or issues, now it’s ready to launch it your target audience. Promote your portal through channels like social media, local advertising, as well as word-of-mouth.

Monitor and Update – Monitor the performance of your portal and collect user feedback to know about areas for improvement.

Pisonet WiFi Machine Price:

Research machine options- Research the various Pisonet WiFi machines available in the market. Take into account the factors like durability, specifications, brand reputation, as well as customer reviews.

Compile an overview – Make a comprehensive overview for different machine available in the market.

Set prices – Decide the prices for every machine based on your pricing level and packages. Consider manufacturing costs, demands in market, competition, and profit margins while deciding your prices.

Pisonet WiFi Vendo:

The Pisonet WiFi Vendo machine merge functionalities of the Pisonet with a vending machine as well as WiFi access point. Which provides users the benefits of accessing the internet by computers while also offering refreshments or snacks to buy.

Users can make payments for computer utilisations, WiFi connectivity, and purchasing vending machine items using different payment methods with coins, tokens, or cashless methods.

Also some setups may involve with loyalty programs as well as rewards to motivate the repeated customers. The Pisonet WiFi Vendo machine offers a combine solution for entertainment, internet access, as well as refreshment vending in one convenient space.

WiFi Pisonet Setup

A WiFi Pisonet setup includes creating a network where users access the internet through WiFi-connected pc’s and their own devices for free. Which basically involves to configuring the WiFi router, setting the user authentication if needed, and offering the comfortable space including a seating as well as computer terminals. Users gets connected to the network, pay according to your usage, as well as enjoy internet browsing or gaming.

Conclusion

In conclusion, we have mention above about the Pisonet wifi spectaculars by connecting to WiFi connectivity by convectional computer rental services, this setup serves to the developing a requirements of customers those who prefers the wireless connectivity and flexibility as well.

For browsing, gaming, as well as other online activities, the WiFi Pisonet setup offers the users with easy access to digital world.

Also, the execution of user authentication as well as optimization measures make sure about a secure and easy internet experience as well.

A complete WiFi Pisonet setup offers the forward-thinking approach to boost the user experience as well as meeting the requirements of today’s technology-driven society.

How to Update Router Firmware (10.0.0.1 & 192.168.0.1) in 2027

Are you tired of waiting for web pages to load, or feeling uneasy about the security of your online activities? If so, you’re not alone. Many of us experience frustration with our Wi-Fi networks.

In today’s digital age, where our reliance on the internet has never been greater, the performance and security of our home networks are paramount. One often overlooked aspect that can significantly impact both is the firmware running on our routers. Outdated firmware can not only result in sluggish performance but also leave our networks vulnerable to cyber threats.

Update Router Firmware

But fear not! There’s a straightforward remedy to these issues: an update router firmware. This essential step can enhance your wifi speed and fortify its defenses against online threats.

In this comprehensive guide, we’ll go through the process of updating your router’s firmware. We’ll provide clear, step-by-step instructions to ensure a smooth and successful update, tailored to your specific router model.

So, if you’re ready to say bye to buffering frustrations and security concerns, read on. 

Before Updating Router Firmware 

There are four things that you need to do before updating your router’s firmware –  

  • Identify your router model 
  • Locate your router’s IP address 
  • Access your router’s interface
  • Backup your router configuration

Step 1 – Identify your router model

Identifying your router model is a crucial first step in the firmware update process and you can do it in two ways – 

# Check the user manual

The easiest way to find your router’s model number is by referring to the user manual that came with the router. The model number is typically listed on the cover or on one of the first few pages.

# Examine the router itself

If you no longer have the user manual or can’t find it, don’t worry! You can still locate the model number directly on the router. Flip the router over or look on the back or underside of the device. You should find a label or sticker containing various information about the router, including the model number. It may be labeled as “Model,” “Model Number,” or simply “M/N.” Once you’ve located this information, make a note of the model number for reference during the firmware update process.

Step 2 – Locate your router’s IP address 

Locating your router’s IP address is essential for accessing its interface and performing a firmware update. Here’s how to do it – 

For Windows

  • Press the Windows key + R.
  • Type “cmd” and press Enter to open the Command Prompt.
  • Then, type “ipconfig” and press Enter.
  • Look for the “Default Gateway” under the network adapter you’re using (usually labeled as Ethernet or Wi-Fi). The default gateway is your router’s IP address.

For macOS

  • Hit the Apple menu and choose “System Preferences.”
  • Choose “Network” and select your active network connection on the left sidebar (Wi-Fi or Ethernet).
  • Click on the “Advanced” button.
  • Go to the “TCP/IP” tab, and you’ll find your router’s IP address listed as the “Router” address.

Step 3 – Access your router’s interface

Open a web browser. In the address bar, search for your  router’s IP address. This should take you to your router’s login page, where you’ll need to enter your router’s username and password. 

[If you haven’t changed these from the default settings, you can find them in your router’s manual or on the router itself]. 

Once logged in, you’ll have access to your router’s settings and can proceed with the firmware update process.

Step 4 – Backup your router configuration [optional] 

Backing up your router’s configuration is a wise precautionary measure before updating its firmware. But it’s not necessary. So if you wanna skip it, you can. Now, let’s know how you can do it –  

  1. Locate the backup or settings section: Navigate through the settings menu to find the backup or settings section. This may be labeled differently depending on your router’s manufacturer, but common terms include “Backup Settings,” “Configuration Management,” or “Administration.”
  2. Backup your router’s configuration: Look for an option to save or backup your current settings. This process may involve clicking on a button or link labeled “Backup” or “Save Configuration.” Follow the on-screen instructions to complete the backup process.
  3. Save the backup file: After initiating the backup, your router will likely prompt you to download the backup file to your computer. Choose a location on your computer where you can easily locate the file in the future.

Update Router Firmware 

After logging in, navigate through the router’s settings menu to locate the firmware update section. This section may have different names depending on the manufacturer but is commonly labeled as “Firmware,” “Update,” or “Router Upgrade.”

[The location of this section may vary, so you may need to explore different menus or tabs within the router’s interface to find it]. 

Some routers offer an automatic update feature that allows the router to check for and apply updates automatically. If this feature is available, simply enable it, and the router will handle the update process for you.

If automatic updates are not available or if you prefer more control over the update process, you can perform a manual update.

Visit the manufacturer’s website and go to the support/downloads section. Search for the latest firmware for your specific router model and revision. Then, download the firmware file to your computer and ensure that it matches your router’s model and revision.

After that, upload the firmware file through the router interface. Return to your router’s web interface and navigate to the firmware update section. Look for an option to upload or install firmware. Select the firmware file you downloaded and initiate the update process.

Follow any on-screen instructions provided by the router’s interface to complete the update.

Important Considerations During Update

First of all, maintain a stable internet connection. A stable connection helps prevent any interruptions or data loss during the update, which could potentially corrupt the firmware or cause other issues.

While both wired and wireless connections are possible, a wired connection is generally recommended for firmware updates. Why? Because wired connections are typically more reliable and less susceptible to interference or signal loss compared to wireless connections.

Second is – Do not interrupt the update process. Interrupting the update, such as by powering off the router or disconnecting it from the power source, can lead to serious consequences, including “bricking” the router.

Last is – Wait for the router to reboot after the update. After the firmware update is complete, it’s essential to allow the router sufficient time to reboot and apply the changes. This reboot process may take several minutes, during which the router may appear unresponsive. So avoid attempting to access the router’s settings or perform any further updates until the reboot process is complete. Trying to interact with the router too soon could disrupt the reboot sequence and potentially cause issues.

After the Router Firmware Update

After updating the router firmware, you can ensure that your router is functioning optimally by verifying the update and monitoring its performance. 

# Verify successful update 

Once you’ve completed the firmware update process, it’s essential to verify that the update was successful. Here’s how you can do it:

  • Enter your router’s IP address in a web browser.
  • Log in with your router credentials.
  • Move to the firmware or system settings section.
  • Compare the version number displayed with the latest firmware version available from the manufacturer’s website. If they match, it indicates that the update was successful.

If the version numbers do not match, you may need to repeat the update or troubleshoot any issues that arose.

# Monitor your network performance 

After updating your router’s firmware, it’s a good idea to monitor your network performance to ensure that the update has had the desired effect. Here are some key aspects to consider:

  • Speed: Check if there’s any noticeable improvement in your internet speed after the update. You can use online speed testing tools or compare download and upload speeds with those before the update.
  • Stability: Pay attention to the stability of your network connection. Are you experiencing fewer dropouts or disconnects compared to before the update?Β 
  • Latency: Monitor the latency or ping times of your network. Lower latency indicates better responsiveness.Β 

⭐ Keep in mind that it may take some time for any changes resulting from the firmware update to become apparent. 

Why Should You Update Router Firmware? 

Updating your router’s firmware offers many benefits. Key of them are – 

# Enhanced Security

Manufacturers regularly release firmware updates to patch security flaws and address potential vulnerabilities that could be exploited by cybercriminals. By staying up-to-date with firmware updates, you reduce the risk of unauthorized access, malware infections, and other cyber threats.

# Improved Performance

Firmware updates often include optimizations and bug fixes that can improve the overall performance of your router. By applying firmware updates, you can experience faster internet speeds, more reliable connections, and smoother performance for all your online activities. 

# Enhanced Features

Firmware updates may also introduce new features or functionality to your router, providing additional capabilities or improvements to existing features. 

# Stability and Reliability

Outdated firmware can sometimes lead to stability issues or unexpected behavior, such as random reboots, network dropouts, or sluggish performance. Firmware updates often include stability improvements and bug fixes that address these issues, resulting in a more stable and reliable network experience. 

# Extended Device Lifespan

Regularly updating your router firmware can help prolong the lifespan of your router by addressing hardware issues. 

End Note

Updating router firmware isn’t a tough task. By following the above mentioned steps, you can do so within a few minutes. 

But if the above steps don’t work for you, reach out to your router manufacturer’s technical support. They can provide specific troubleshooting steps based on your router model and error message. You can find support contact information on the manufacturer’s website.

Important Note: Avoid repeatedly attempting the update if it fails consistently. This can further complicate the issue.

10.10.10.l Piso WiFi Portal: Login, Pause Time & Admin Access (2026–2027)

⚑ 10.10.10.1 Direct Gateway

10.10.10.l or 10.10.10.1 Piso WiFi Portal

10.10.10.l ends with the letter “L” instead of the number 1. The valid IP address is http://10.10.10.1 (or default gateway http://10.0.0.1). Tap to open your session:

The 10.10.10.l Piso WiFi Portal is like a special place on the internet. It gives cheap internet to people in the Philippines and other places. You can find it by typing 10.10.10.l in your web browser. When you get there, it’s like a front door to the internet. It has a page where you can sign up or log in to use the internet. To use it, you usually have to pay a little bit of money.

You can pay with coins, your phone, or a special card. Once you’ve paid, you can use the internet for a while. How long you can use it depends on how much you paid. This portal is a helpful way for people who can’t afford regular internet to get online. It’s easy to use and doesn’t cost much. It’s like opening a door to a world of information and fun on the internet. It makes life easier for people who need it.

10.10.10.l Piso WiFi Portal

Understanding the Concept of Piso WiFi

Piso WiFi, derived from the Filipino term “piso,” which means “coin” in English. It refers to a business model where individuals can access Wi-Fi connectivity for a certain fee. Users usually pay in coins. You can find it in different places like stores, bus stations, and neighborhoods. Piso WiFi is easy to understand. You just need to put some coins in, and you can use the internet for a while.

This idea helps people who can’t get regular internet access. In some places, internet services are too expensive or hard to get. But with Piso WiFi, anyone with a few coins can go online. It’s like opening a door to a world of information and fun. Piso WiFi is like a bridge.

It connects people who can’t afford regular internet to the online world. It’s a simple and helpful idea that makes a big difference. So, whether you’re in a busy store or waiting for a bus, Piso WiFi lets you stay connected without any fuss.

Features of the 10.10.10.l Piso WiFi Portal

  • User Authentication

When you want to use the 10.10.10.l Piso WiFi Portal, you need to prove who you are. You might have to make an account or give your username and password. This helps keep the portal safe and secure.

  • Payment Integration

You can pay to use the portal in different ways. You might use coins, your phone to pay, or special cards. This makes it easy for everyone to use, no matter how much they want to pay.

  • Time-based Access

When you pay to use the portal, you get to use it for a certain amount of time. It’s like renting it for a little while. This helps make sure everyone gets a fair turn to use the Wi-Fi.

  • Usage Monitoring

The portal keeps track of how much internet you use. It counts how much data you use and how long you stay connected. This helps you know how much you’ve used and helps the people running the portal manage it better.

  • Customer Support

If you have a problem using the portal, there are people who can help you. You can call them on the phone, chat with them online, or look for answers to common questions. They’re there to help make sure everything works smoothly.

  • Customization Options

The people who run the portal can change how it looks. They can put their logo on it or show special messages. This helps make the portal feel more familiar and friendly to the people using it.

Benefits of the 10.10.10.l Piso WiFi Portal

  • Affordable Access

The 10.10.10.l Piso WiFi Portal makes internet connection cheap for people. They only need to pay a small fee to use it. This helps people who cannot afford expensive internet services to still get online.

  • Accessibility

The portal lets people connect to the internet in many places like parks, stores, and neighborhoods. This means more people can use the internet, even if they live in areas where getting online is hard.

  • Revenue Generation

People who provide the Piso WiFi service can make money from it. By charging a small fee for internet access, they can earn money to cover their costs and maybe make some extra profit.

  • Community Engagement

The portal helps people in a community connect with each other online. They can share ideas, talk, and learn new things. This builds a stronger community where people help and support each other.

  • Digital Inclusion

The portal helps people who don’t have internet access to join the online world. This means they can do things like learn new skills, find jobs, and access important information. It opens up new opportunities for them.

The 10.10.10.l Piso WiFi Portal brings many benefits. It makes internet access affordable and accessible to more people. It also helps communities connect and support people in joining the digital world.

Challenges and Considerations of the 10.10.10.l Piso WiFi Portal

  • Infrastructure Limitations

The portal needs good internet stuff to work right. But in some places, there may not be good internet stuff. This can make the portal slow or not work at all. So, before setting up the portal, it’s important to check if the internet stuff is good enough.

  • Security Concerns

The portal is like a door to the internet. But sometimes, bad people try to break in and do bad stuff. So, the portal needs to be protected from these bad people. This means having strong locks and security systems to keep the bad people out.

  • Regulatory Compliance

There are rules and laws about how the internet should be used. The portal needs to follow these rules to avoid getting into trouble. This means doing things like protecting people’s privacy and following the law.

  • Technical Support

Sometimes, the portal may not work right. When this happens, people need help to fix it. This is where technical support comes in. It’s like having a helper who knows how to fix things when they go wrong.

  • Sustainability

The portal needs to be able to keep running for a long time. This means making sure it can pay for itself and doesn’t run out of money. It also means making sure people still want to use it. So, it’s important to think about how to keep the portal going in the long run.

The 10.10.10.l Piso WiFi Portal has many benefits, but it also comes with challenges that need to be addressed. These include making sure the internet stuff is good, keeping bad people out, following the rules, helping people when things go wrong, and making sure the portal can keep running for a long time.

Conclusion

In conclusion, the 10.10.10.l Piso WiFi Portal is a good idea to help people get cheap internet in the Philippines and other places. It works like a vending machine for Wi-Fi, letting folks pay a little bit to go online. Even though there are some problems like bad internet and safety worries, this portal can still do a lot of good. It can help more people join the digital world and connect with others. By being smart about how we set it up, spend money on it, and keep it running smoothly the 10.10.10.l Piso WiFi Portal can really change lives. It’s all about giving everyone a chance to get online and be part of the digital age.

Frequently Asked Questions

Q: Can I use the 10.10.10.l Piso WiFi Portal on multiple devices?

Answer: Yes, you can use the portal on multiple devices as long as you’re connected to the same Wi-Fi network. Just make sure to log in with the same account or use the same payment method on each device.

Q: Can I use the 10.10.10.l Piso WiFi Portal in any location?

Answer: The availability of the portal depends on where it’s been set up. You’ll typically find it in public places like cafes, convenience stores, or transportation terminals. Look for signs or ask the staff if the portal is available in that location.

Q: Is there a limit to how many times I can connect to the portal in a day?

Answer: There is typically no limit to how many times you can connect to the portal in a day. As long as you have sufficient balance or time remaining, you can connect and disconnect as needed throughout the day.

192.168.0.1 Admin Login, Default Password & Router Setup (2027 Guide)

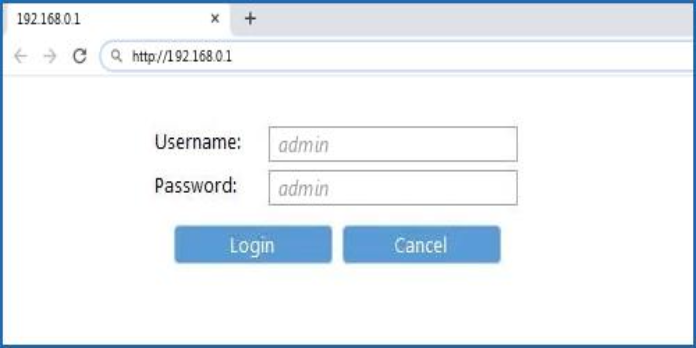
The address 192.168.0.1 is a private IP address that’s typically used by home network routers as the default gateway. It acts as the entry point for devices on your network to access the internet. 

192.168.0.1 Login

What Does 192.168.0.1 Allow You to Do? 

192.168.0.1 allows you to access the router’s admin panel and configure network settings. 

  • Access the router’s admin panel: By entering 192.168.0.1 in a web browser’s address bar, you can reach the router’s configuration settings. This panel allows you to manage your Wi-Fi network, including setting passwords, creating guest networks, and enabling parental controls.
  • Configure network settings: You can change the router’s SSID (name), change your WiFi password from mobile, security type, and manage other settings related to your home network.

How to Do 192.168.0.1 Login? 

Logging into a router’s admin panel can be risky if done on an untrusted network. So make sure you are on your home network before proceeding. Now, let’s get to 192.168.0.1 login process – 

  1. Connect to your home network: Make sure your device (computer, phone, tablet) is connected to your home Wi-Fi network.
  2. Open a web browser: Open any web browser you prefer, like Chrome, Firefox, or Edge.
  3. Enter the IP address in the address bar: In the address bar, type http://192.168.0.1 and press Enter.
  4. Login with 192.168.0.1 username and password.
  5. Access the router’s admin panel: Once you’ve entered the correct credentials, you should be logged in to your router’s admin panel, where you can configure your network settings.

If you encounter any issues logging in, such as incorrect username/password or unreachable IP address, here are some additional tips:

  • Double-check the IP address: Ensure you’ve typed http://192.168.0.1 correctly in the address bar.
  • Consult the router’s manual: The router’s manual should provide specific instructions for logging in and troubleshooting common issues.
  • Reset the router: If you’ve forgotten the login credentials and can’t find them anywhere, you can reset the router to factory settings. This will erase all custom settings you’ve made, so only proceed if necessary. There’s usually a reset button located on the back of the router that you can press for a few seconds to trigger a reset. Refer to your router’s manual for specific instructions on resetting.

How to Find Your 192.168.0.1 password and username? 

There are three ways to find your router’s specific username and password:

  1. Check the Router Sticker: Most routers have a sticker on the back or underside that includes the default username and password for the admin panel. Look for labels mentioning “Router Login,” “Wireless Settings,” or “Default Password.”
  2. Consult the Router Manual: Your router’s manual should have the default username and password in the setup instructions or troubleshooting section. You can usually find the manual online by searching for the model number of your router followed by “manual.”
  3. Search Online by Router Model: If you don’t have the manual, you can try searching online for the default username and password for your specific router model. 

Important Note: Keep in mind that using the default username and password is not recommended for long-term use. It’s best to change them to something strong and unique after your initial login to improve your network security.

192.168.0.1 Router Tenda

For Tenda routers, 192.168.0.1  is a likely default gateway address used to access the router’s admin panel. This panel allows you to configure various settings for your home Wi-Fi network.

Here’s what you can do on a 192.168.0.1

Tenda router: 

  • Change your Wi-Fi network name (SSID) and password: This is essential for securing your network and preventing unauthorized access.
  • Set up guest Wi-Fi: This creates a separate network for guests with limited access to your main network resources.
  • Configure parental controls: You can restrict internet access for certain devices or block specific websites.
  • Manage connected devices: See a list of devices currently connected to your Wi-Fi network.
  • Change router settings: You can modify advanced settings like firewall options, port forwarding, and more.

How to Log in to your Tenda router? 

  1. Connect to your Tenda Wi-Fi network.
  2. Open a web browser.
  3. Type http://192.168.0.1 in the address bar and press Enter.
  4. Enter the username and password. And that’s all. After this, you can do whatever you want through the admin panel. 

Enhancing Campus Connectivity: GSB WiFi System

Gsb wifi network is private and records every usage trace. Details such as entry-exit times, IP addresses, websites visited, and information about downloaded files are stored in log files.

Gsb Wifi service is a free internet service that can be used by students staying at the Credit and Dormitories Institution of the Philippines. You can benefit from this internet service by logging into the KYK WiFi network. This service only serves students living in student residents. This category includes solutions to problems such as Gsb Login and Logout.

Gsb wifi

In this guide we have explore about the GSB wifi system, what is GSB wifi, how to activate it and some important things regarding the GSB wifi. So let’s get dive into the article and update your current knowledge about the GSB wifi.

What is GSB wifi?

GSB wifi is a free internet network provided for university students staying in student residence belonging to the Credit and student residential Institution, Philippines. Each student can use the internet limited to monthly quotas, and the quotas are renewed at the beginning of the new month.

How to Activate GSB WiFi?

To solve this problem, you must first log in to e-government and set your password. You can easily create your password by following the steps below:

  • Enter the e-government application.
  • Type GSB WiFi in the search bar in the upper right corner of the screen and click on the option that appears.
  • After reading the β€œStudent Commitment Agreement“, approve it and continue the process.
  • Set your password according to the criteria specified on the next page after this step Log in to the tr page.
  • On the next page, enter your TR ID Number in the β€œUser Name” field, the password you created in the β€œPassword” field and click the β€œConnect” button.

What is GSB Wifi Username?

  • GSB wifi username is your TR ID number. For foreign students, passport numbers are used.
  • The username is absolutely fixed and cannot be changed.
  • GSB wifi password is a default determined by the dormitory administration and must be changed at the first entrance.
  • To change your password, you can log in to the GSB wifi login page by entering your TR ID number and predefined password.
  • Afterwards, you can create your new password by clicking the β€œChange My Password ” button.

How to Get Gsb Wifi Password and Login?

To benefit from the free Wi-Fi service of the Ministry of Youth and Sports, you must first be a student registered with GSB.

  • If you live in a dormitory, you can go to the dormitory management and request internet access.
  • Firstly through e-government Gsb password receivable. Or, go to the Youth and Sports Department and find information on the dormitory website.
  • Free student registration procedures you can perform your password transactions from the section.
  • Then enable Wifi access on your phone or computer. Networks you can connect to Piso WiFi 10.0.0.1 portal You will see a network named.
  • GSB WIFI When you click on the network, you will be asked for your identity information in order to use the internet service.
  • Enter the username and password you received from the dormitory management or e-government in this field.
  • Then your internet connection will be established.
  • If the page asking for your credentials to connect to the WIFI network does not open automatically, you can log in yourself.
  • To do this, after seeing that the internet connection has been established, open your device’s internet browser and log in to ​​internet address.
  • The page that opens at this address will ask you to log in to the system. Here your username and password you can benefit from free internet service by logging in.

How to Use GSB WiFi

For Students, Faculty, and Staff-

  • Access network settings: Open the network settings on your device like smartphone, laptop, and tablet.
  • Find available networks: Scan for available WiFi networks. Look for “GSB WiFi” in the list of options.
  • Connect to GSB WiFi: Select “GSB WiFi” from the list of available networks. If prompted, enter the network password or any required credentials provided by the university.
  • Authenticate: In some cases, you may need to authenticate your connection by logging in with your university credentials or agreeing to terms of service.
  • Enjoy connectivity: Once connected, you can now access the internet and other network resources available through GSB WiFi.

For Visitors-

  • Access guest network: Visitors to the campus can connect to the guest network provided by GSB WiFi. Look for the network named “GSB Guest WiFi” or similar.
  • Authenticate: Depending on the network settings, visitors may need to authenticate their connection by agreeing to terms of service or entering a temporary access code provided by the university.
  • Enjoy limited connectivity: The guest network may have limited access to certain resources compared to the main GSB WiFi network. However, it still provides basic internet connectivity for visitors’ convenience.

Gsb Wifi requirements:

  • To log in and out of the GSB WiFi network, it is important that you use the most up-to-date browser version, this is usually the latest version of Google Chrome.
  • Older browsers may not complete operations even after you log out from time to time.
  • When using GSB WiFi, factors such as 3G/4.5G connection or VPN use on your mobile device may cause problems in the WiFi GSB output.
  • When you need to enter the official website of GSB wifi ​​for smooth access, you must ensure the connection via WiFi or mobile data.
  • If your session keeps getting disconnected and you are unable to connect, you may need to reset your Wi-Fi settings and install the required certificate.
  • By taking these points into consideration, you can optimize your user experience.

Features of GSB WiFi:

  • High-speed connectivity– Main key feature of GSB WiFi is granting of high-speed internet connectivity. The network is equipped with ultra-modern infrastructure capable of delivering fast and reliable internet access to meet the requirements of bandwidth-intensive activities like online research, multimedia streaming, video conferencing, as well as file downloads. This high-speed internet connectivity improves the productivity as well as facilitates efficient communication and collaboration among students, faculty, and staff as well.
  • Security- Security is most important aspect in GSB WiFi to protect the user data as well as protect integrity of the internet network. The network engage robust encryption protocols, like WPA2 or WPA3, to encrypt data transmissions as well as restrict the unauthorized access or monitor. However, authentication mechanisms, like username and password authentication or digital certificates, are execute to make sure that only authentic users can connect to the wifi network. Network segmentation as well as access controls are also engaged to separate and protect sensitive resources from unauthentic access, improving overall network security.
  • Comprehensive coverage– GSB WiFi is structured to provide fine coverage across entire campus of Generic State University. Which make sure that the students, faculty, staff, and visitors can access the internet network smoothly from various locations, including student residence, classrooms, libraries, outdoor areas, as well as administrative buildings. Internet network is strategically position with an enough number of access points to reduced coverage gaps as well as ensure consistent connectivity right through the campus premises.
  • Scalability and reliability- GSB WiFi should be scalable and reliable, and also needs to be capable of adapting the extended number of devices and users on the network. The network infrastructure is scalable when it support enhanced bandwidth requirements and user capacity as the campus population expands or technology evolves.
  • User-friendly interface – GSB WiFi is structured to provide a user-friendly experience for connecting to internet network. Users can easily search and gets connect to the internet network through the devices wireless settings as well as by choosing the internet network from the number of available options. Proper instructions as well as prompts guide users by the connection process, to make it easy for students, faculty, staff, as well as visitors to access the internet without come across technical hurdles.
  • Guest access – GSB WiFi also provide guest access features to accept the visitors and guests to the campus. A separate guest network or portal may be established to offer limited internet access to visitors while ensuring the security and integrity of the main network.
  • Quality of service – GSB WiFi can implement Quality of Service mechanisms to prioritize network traffic and ensure a consistent user experience for critical applications and services. This policies may be configured to allocate bandwidth resources based on application type, user role, or service level agreements, ensuring that essential functions such as online learning platforms, video conferencing, and administrative systems receive adequate network resources and performance.

Some important tips about GSB WiFi 

  • GSB WiFi what else is there to know about it? We have briefly listed what you need to know about GSB Wifi. 
  • Only students staying in this Gsb student residence can benefit from the GSB Wifi network.
  • You have a monthly internet quota of 16 GB for the Gsb Wifi network.
  • GSB Wifi input all you need is a username and password.
  • How to get Password and User name here we told.
  • Previously from another device Login to Gsb network if you did so, the system will not allow a second device.
  • GSB Wifi logout for end session you can use the button. If you encounter a technical problem, you can try again after a while.
  • After logging in to the GSB site, do not close the page. If you cannot connect to the GSB network, you can try to restart your phone.
  • If you forgot your password, on the confirmation screen Forgot My GSB WiFi Password You can click the button. 

Troubleshooting

If you encounter any issues connecting to GSB WiFi or experience disruptions in connectivity, you can reach out to the university’s IT support team for assistance. They can provide troubleshooting tips, resolve technical issues, and ensure a smooth experience with the university’s WiFi network.

Conclusion

In conclusion, GSB WiFi plays an important role in facilitating communication, collaboration, and access to information within Generic State University’s campus community.

By providing reliable, high-speed internet connectivity and prioritizing security and user-friendliness, GSB WiFi enhances the learning and working experience for students, faculty, staff, and visitors alike.

Connected to Piso WiFi? Open 10.0.0.1